
Scalding Orb: How Do You Carry and Deliver It?
A burn-management relay item that is easy to misuse if you treat it like a normal quest pickup.
This is not a damage item. It is a relay-and-delivery quest item.
Judge Scalding Orb by carrier safety, clean passing, and final delivery positioning rather than by raw combat value.
Quick verdict
Take it, but route around it
Scalding Orb is worth taking for progression, but only if your team can manage Burn, relay it cleanly, and keep one delivery cat healthy enough to finish the Man in the Moon trigger.
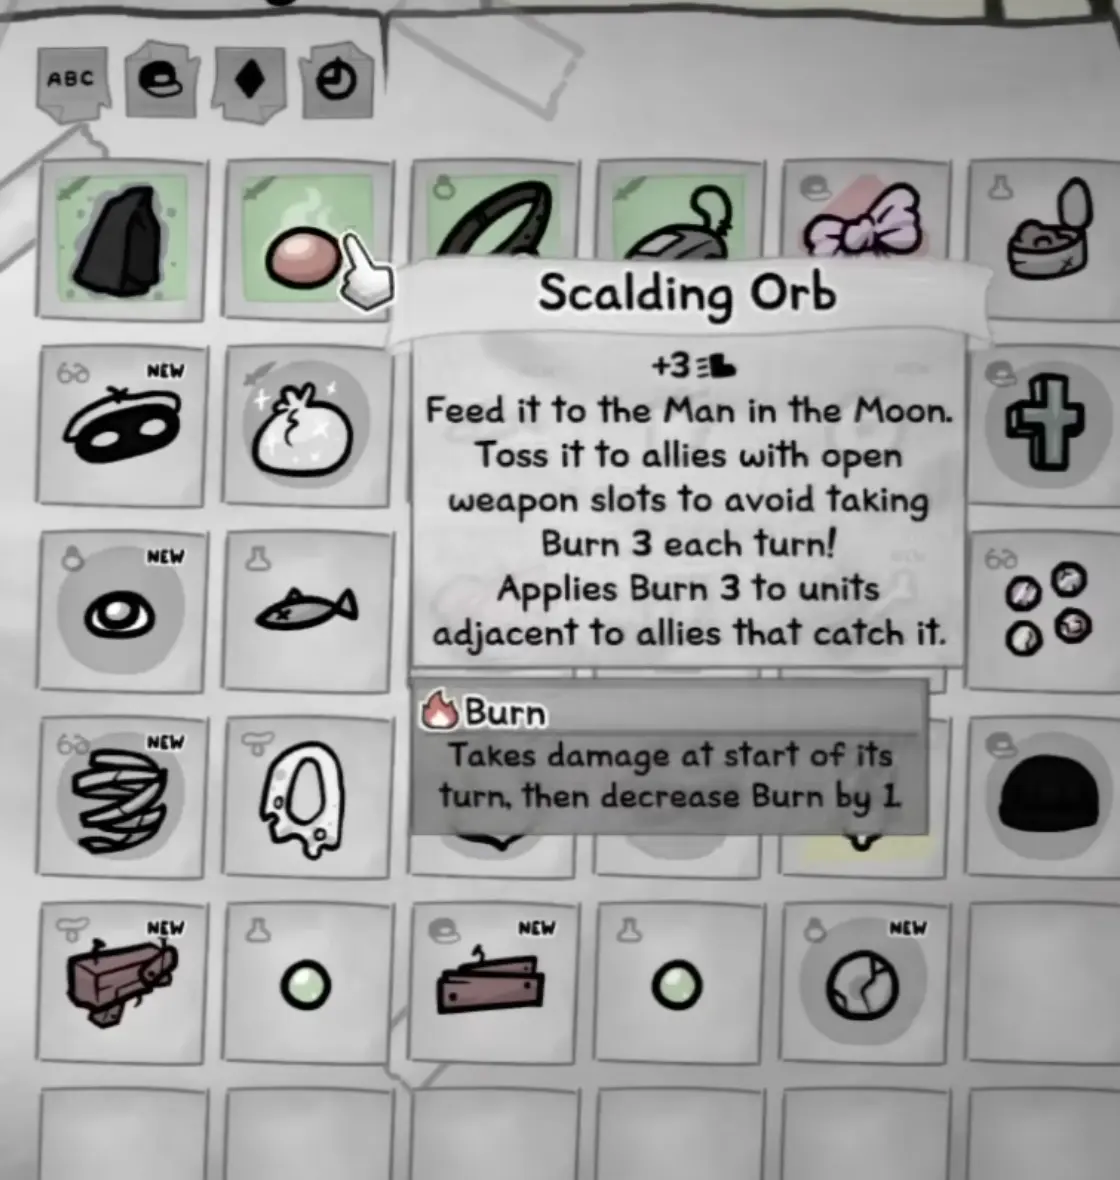
What it does
Start with the tooltip. This proves the Orb's burn, passing, and delivery mechanics before you plan the route.
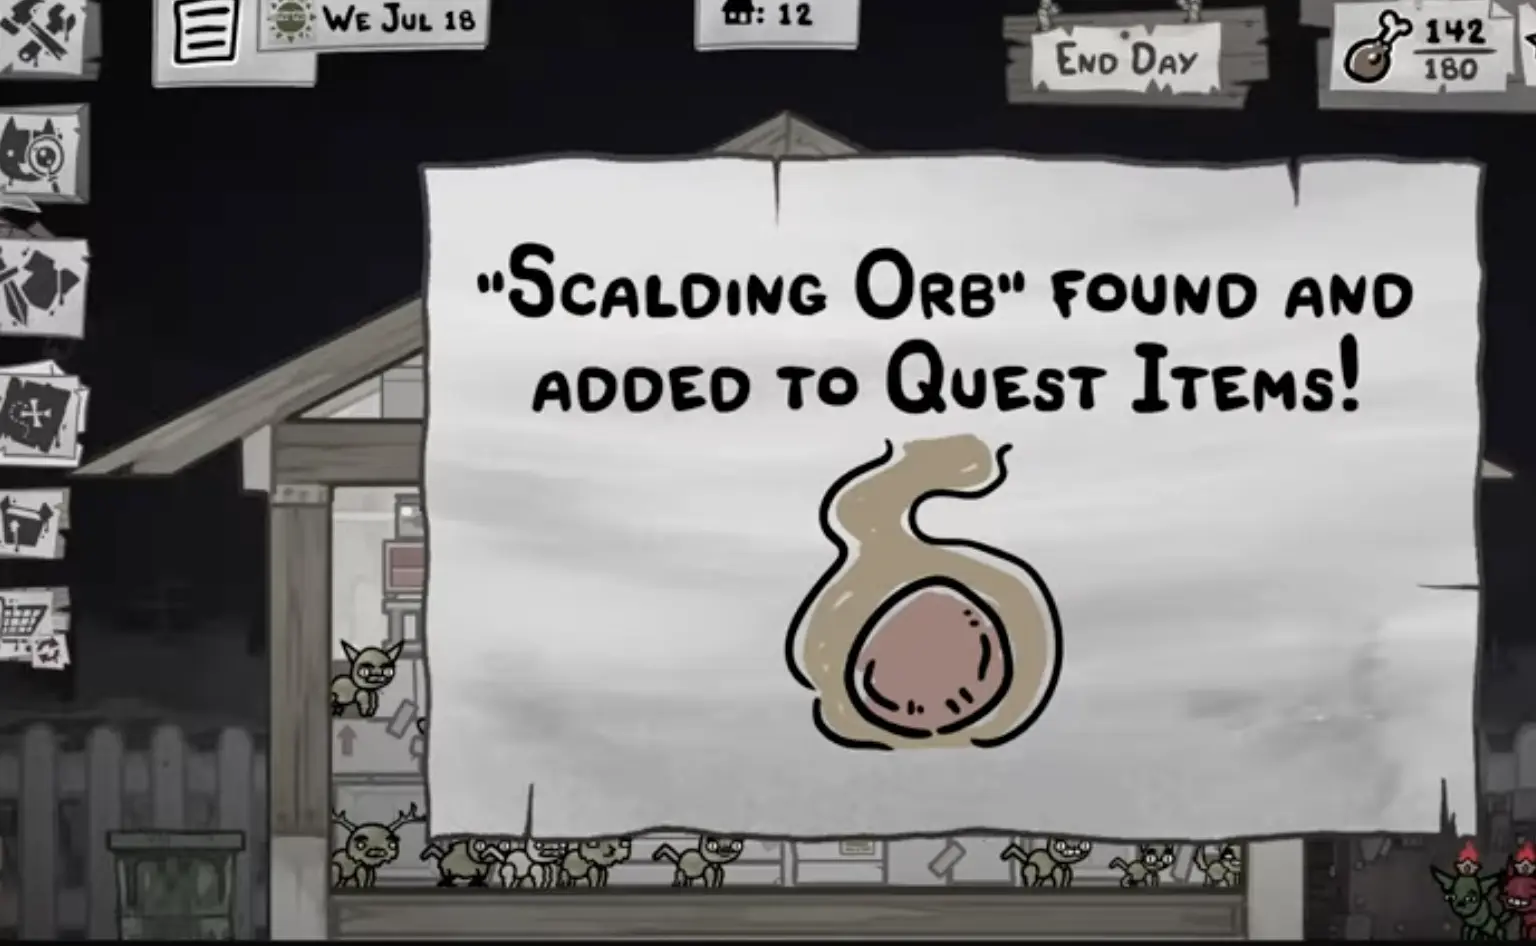
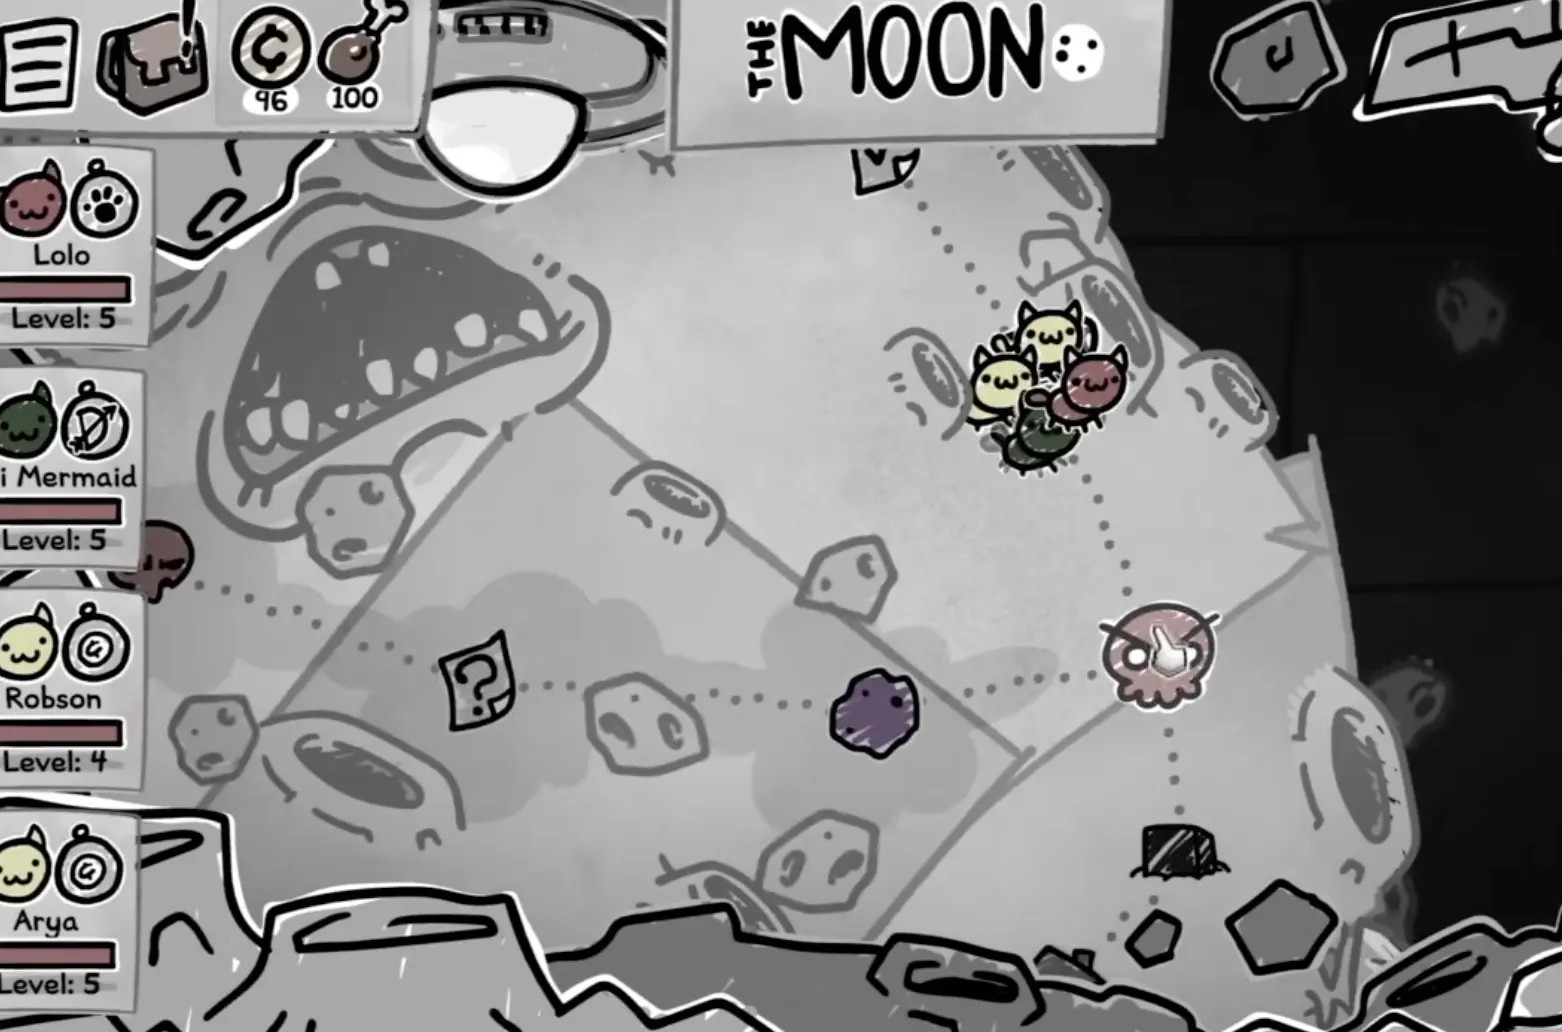
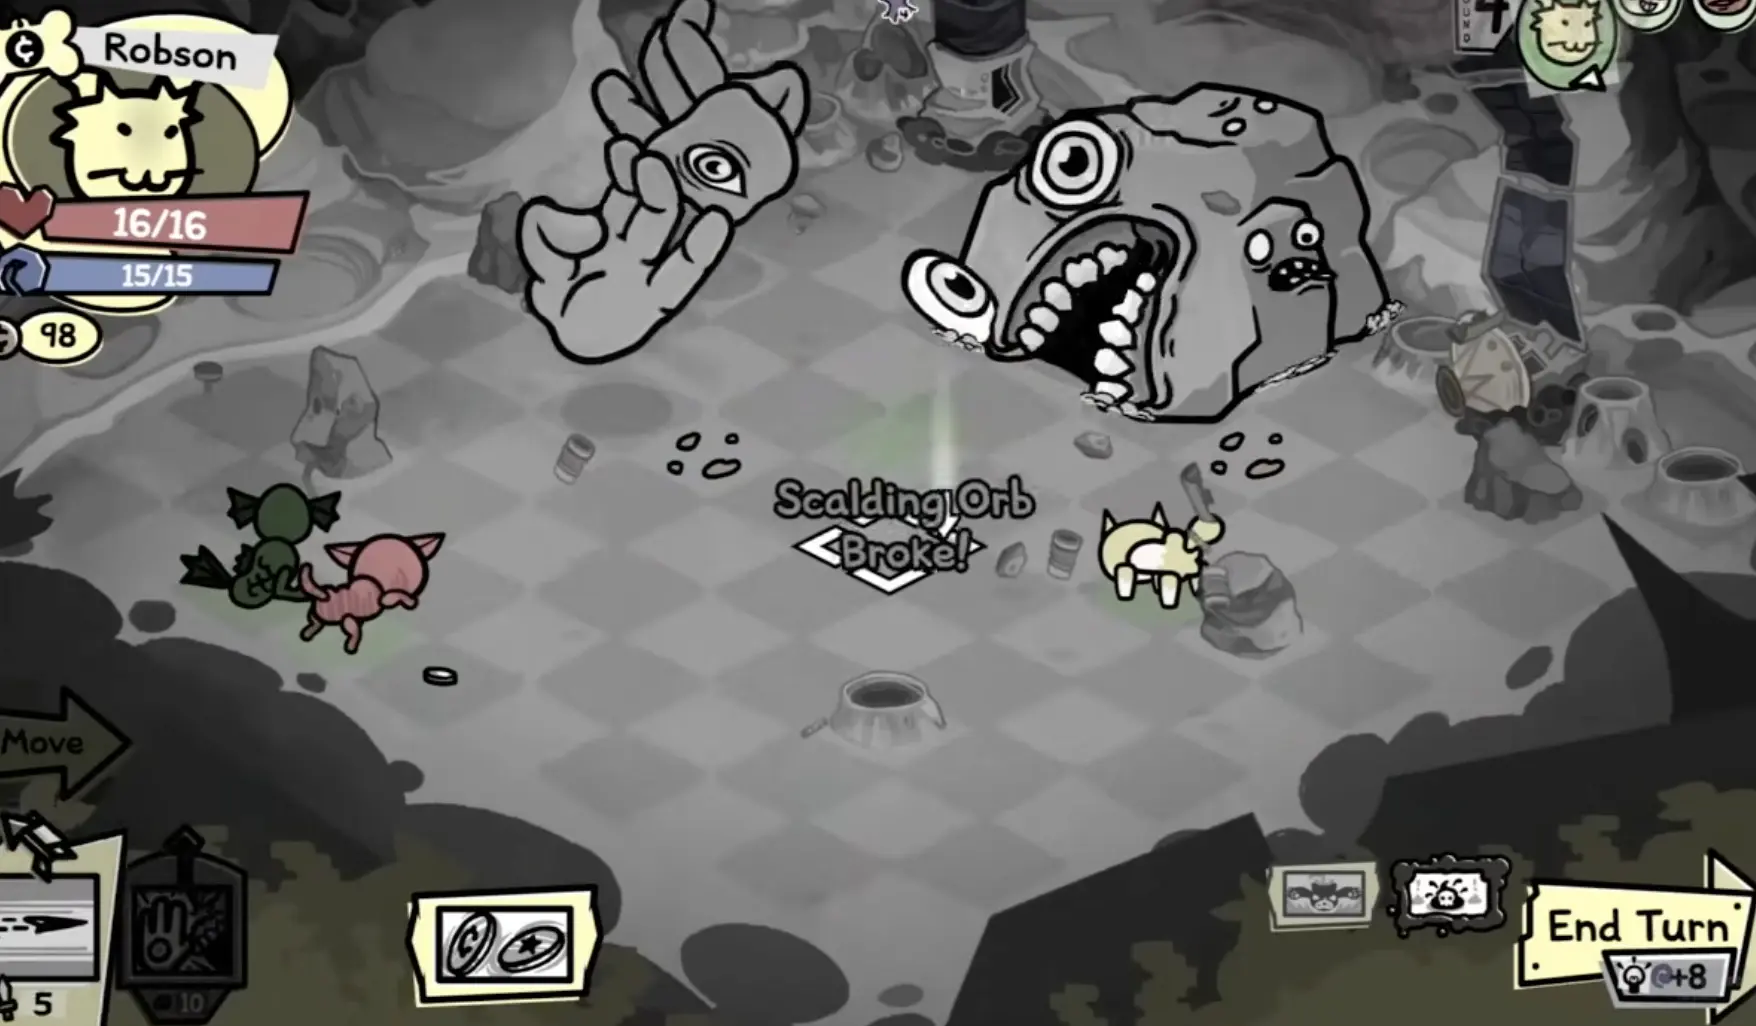
Quest proof
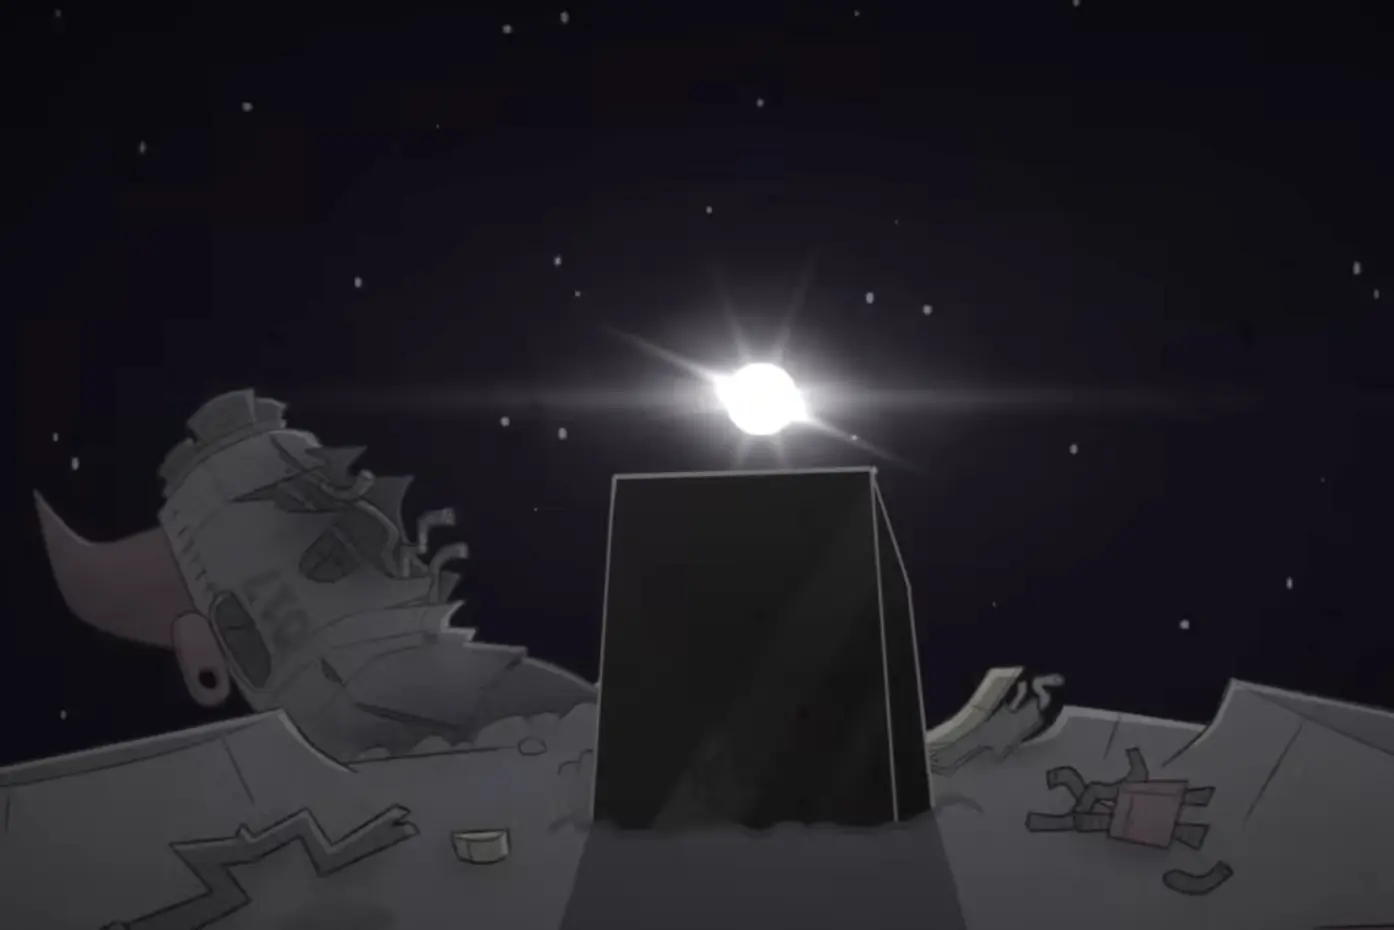
These screenshots show where the route begins and where it is supposed to end.
How to deliver it
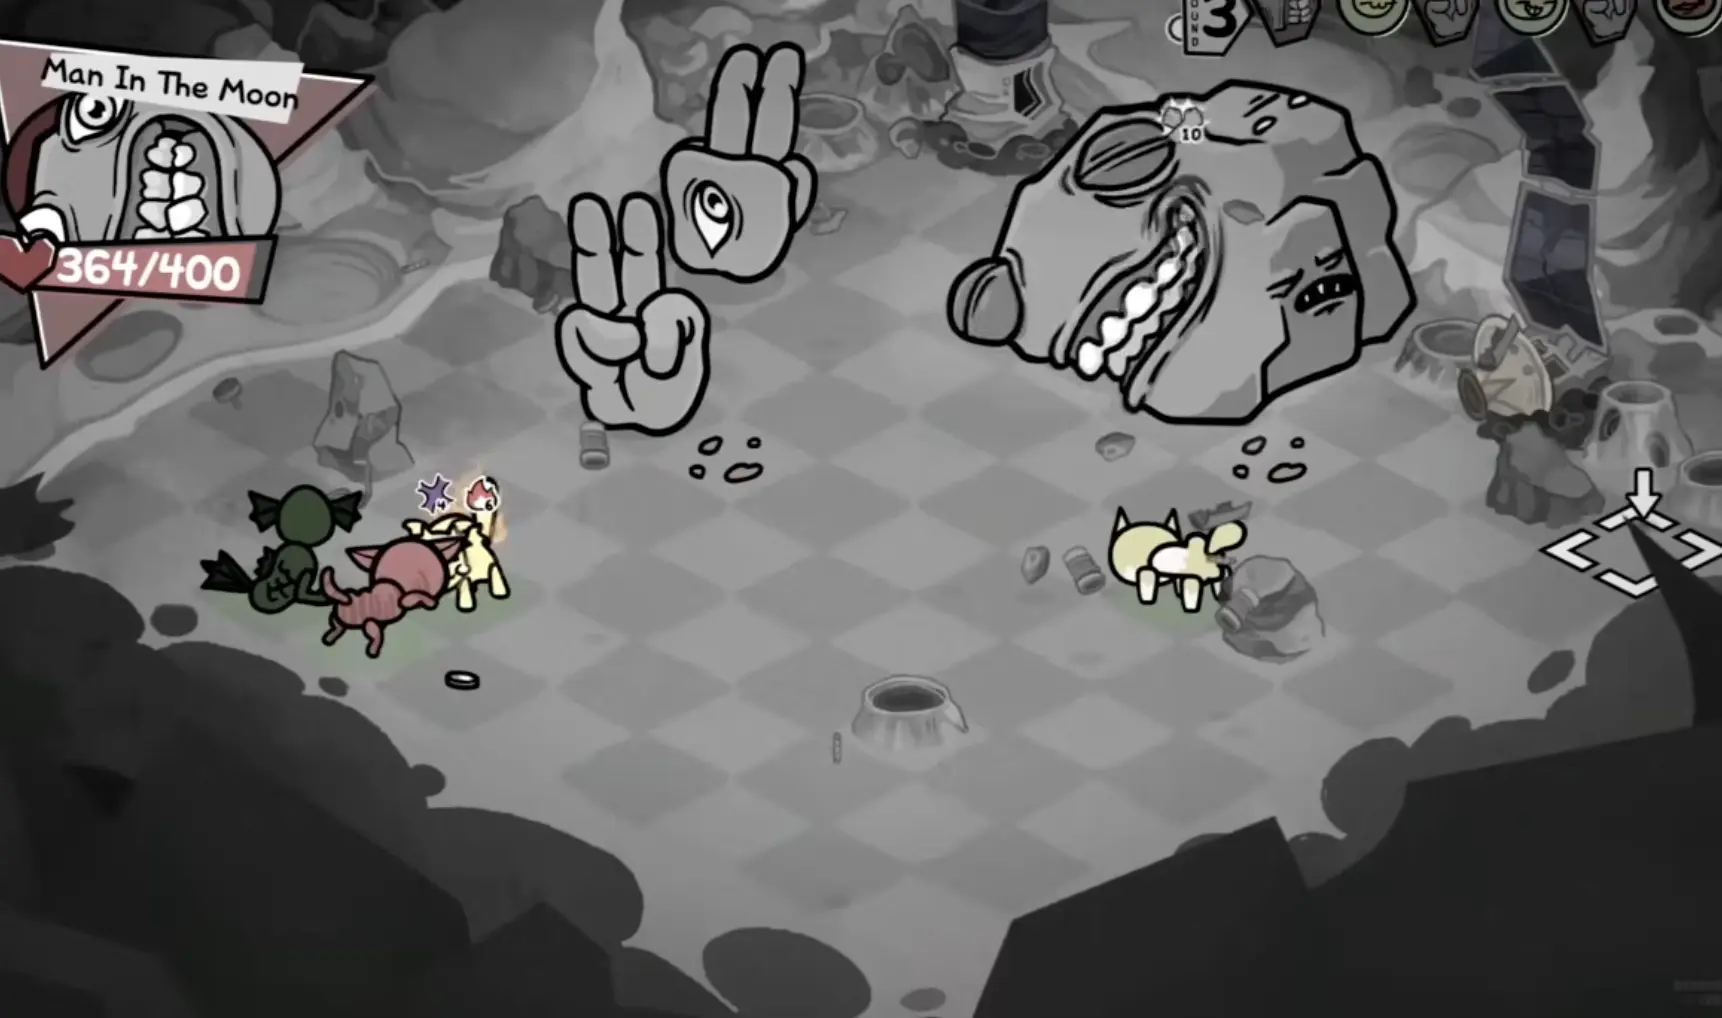
The last step is a positioning trigger, not a simple throw-at-boss shortcut.
Quest steps
- Defeat Pyrophina and obtain Scalding Orb as a quest item reward.
- Start a run that goes through the Desert and continues toward the Moon.
- Relay the Orb between allies with open weapon slots to reduce repeated Burn on one carrier.
- Reach the Man in the Moon with one cat still healthy enough to make the final approach.
- Move the cat holding Scalding Orb directly into the delivery trigger in front of the Man in the Moon.
- Break the Orb, kill the boss instantly, and raise one Moon obelisk.
Route relationship
Scalding Orb is the route item for the Pyrophina -> Desert -> Moon branch. Its real challenge is not damage. It is safe relay, Burn control, and correct final delivery.
Unlocks
- Moon branch quest progression
- One raised obelisk on this route
- Further obelisk / mutation progression after the Moon clear
Who should carry it
- •A mobile carrier who can safely reach the boss face
- •A team with multiple allies that can catch and pass the Orb
- •Runs with cleanse, haste, teleport, or other positioning support
- •Units with flexible weapon slots that can receive the Orb cleanly
- •Stable teams that can protect one final delivery cat
Who should not carry it
- •Brittle main carries that cannot afford repeated Burn ticks
- •Units that rely on locked weapon setups and cannot catch the Orb cleanly
- •Slow teams with poor repositioning tools
- •Runs that already struggle with route control or status cleanup
- •Cats you cannot afford to expose near the Man in the Moon
The real cost
- •The holder takes Burn 3 each turn unless you keep relaying the Orb.
- •Passing it is not free: units adjacent to the catcher can also take Burn 3.
- •Your route is effectively locked toward the Desert and Moon objective.
- •You must reserve safe catches and open weapon-slot handoffs instead of playing a normal inventory plan.
- •The final delivery requires correct positioning in front of the Man in the Moon rather than a simple throw-at-boss shortcut.
Why players fail with it
- •Players hold the Orb too long on one cat and let Burn stack for no reason.
- •They forget that the catcher also scorches adjacent units and create avoidable chip damage.
- •They try to throw the Orb at the Man in the Moon instead of using the real delivery trigger.
- •They bring the Orb on a team with weak movement support and cannot line up the final approach.
- •They choose overly risky route nodes and lose consistency before reaching the Moon.
When to take it
You do not really treat this like an optional early pickup. Once unlocked, it becomes a route-planning item rather than a casual carry.
Best used when your team already has enough cleanse, movement, and passing discipline to manage Burn without chaos.
Still strong for progression, but only if you can keep one delivery cat healthy enough to walk the Orb into the final trigger.
Related bosses, routes, and quest path
Use these pages to understand where Scalding Orb starts, where it ends, and which route this quest branch belongs to.