Can Creeper boss
Mewgenics Β· Boss

Mewgenics Can Creeper Boss Guide

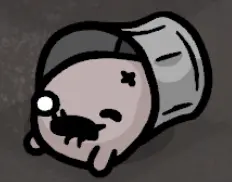
Can Creeper is a two-phase orientation and terrain boss. Phase 1 rewards front-angle attacks; phase 2 drops the can, gains Creep-based mobility, and cannot attack unless it is standing in Creep.

Location: The Junkyard HP 40 Damage 5

Fast answer

Read this first
Main idea

Establish the front arc and avoid wasting early attacks into the protected sides or back.
Biggest mistakes
  • Spending attacks into the protected sides or back in phase 1 and losing the turn without meaningful damage.
  • Letting Creep spread everywhere before phase 2, giving Can Creeper too many safe Swim destinations.
Winning line
  • Attack from the front in phase 1, or use non-projectile ranged or Electric effects that bypass the directional problem.
  • Control Creep coverage before the shell breaks so phase 2 has fewer safe movement and attack tiles.

Can Creeper stats

Core fight data for this boss.

Location
The Junkyard
HP
40
Damage
5
Movement
3
Luck
5
Size
1x1

Mechanics snapshot

The main mechanics and triggers that shape this fight.

Main mechanics
Bonus Turns Directional Defense Creep Summon/Spawn Phase Change Ranged Threat
Key triggers
Phase 1 blocks melee attacks and projectiles from the sides and back; the front remains vulnerable. Slide dashes 6 tiles forward, trampling units and spawning a Fly on the original tile. At 0 HP, Can Creeper discards the can and enters a 20 HP second phase that relies on Creep tiles for attacks and movement.

Moves to know

Important attacks, abilities, or fight behaviors to recognize.

Double Diagonal Creepshot (Phase 1)

Fires two diagonal projectiles for 5 physical damage each and creates Creep where they land.

Slide (Phase 1)

Dashes 6 tiles forward with Trample and spawns a Fly on the starting tile.

Swim (Phase 2)

Teleports to any open liquid tile.

Short Creepshot (Phase 2)

Lobs a projectile to an adjacent tile for 5 physical damage and replaces that tile with Creep.

Fight plan

The safest way to approach the fight without reading a wall of text.

Decision-first notes
Win conditions
Attack from the front in phase 1, or use non-projectile ranged or Electric effects that bypass the directional problem. Control Creep coverage before the shell breaks so phase 2 has fewer safe movement and attack tiles. After the transition, punish turns when Can Creeper is not standing in Creep because it cannot attack from dry ground.
Opener
  • Establish the front arc and avoid wasting early attacks into the protected sides or back.
Midfight
  • Manage Creep while chipping phase 1, then prepare the board before the shell breaks.
Finisher
  • In phase 2, force Can Creeper off Creep when possible and punish the turn it spends returning to a liquid tile.
Positioning & loadout
Run killers, positioning rules, and setup reminders.
β–Ύ
Run killers
  • Spending attacks into the protected sides or back in phase 1 and losing the turn without meaningful damage.
  • Letting Creep spread everywhere before phase 2, giving Can Creeper too many safe Swim destinations.
  • Ignoring the phase transition and getting caught by the faster Creep-dependent ranged pattern.
Positioning rules
  • Re-angle to the front before committing ordinary melee or projectile attacks in phase 1.
  • Do not let all nearby Creep tiles connect into an easy teleport network for phase 2.
  • Place traps or hazards near useful liquid tiles in phase 2 because its pathing can be manipulated.
Loadout hints
Prioritize
AOE or efficient cleanup
Avoid
Single-target-only damage with no cleanup