Zaratana boss
Mewgenics Β· Boss

Mewgenics Zaratana Boss Guide

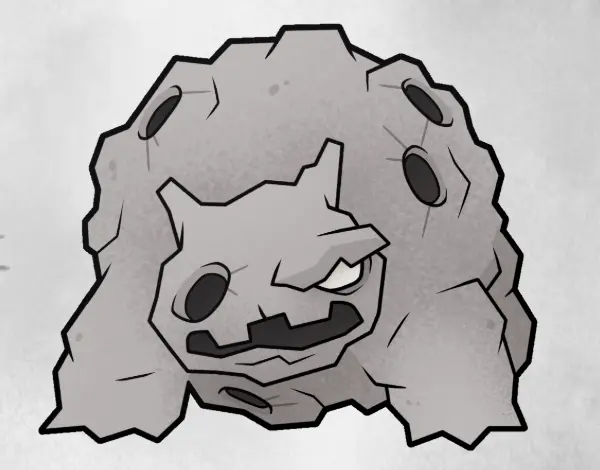
Zaratana is an asteroid-like House Boss in Act 2 of Mewgenics whose fight is really about board state. Most losses come from letting rocks clutter the map, losing safe movement lanes, and then getting punished by Trample while the board is still unstable.

Location: House HP 600 Damage 4

Fast answer

Read this first
Main idea

Identify where Zaratana can Trample safely and deny those lanes early. Start clearing the most dangerous rocks before they become a long-term board tax.
Biggest mistakes
  • Letting the battlefield fill with rocks until your movement lanes disappear.
  • Ignoring Meteor Bombardment and allowing auxiliary hazards to compound every round.
Winning line
  • Control the board so scattered rocks never snowball into a map-loss condition.
  • Respect Trample lanes and avoid giving her easy collisions into your formation.

About Zaratana

Zaratana appears during Act 2. The encounter is built around hazard / kaiju control.

Levitation

Zaratana stats

Core fight data for this boss.

Location
House
HP
600
Damage
4
Movement
3
Luck
5
Size
2x2

Mechanics snapshot

The main mechanics and triggers that shape this fight.

Main mechanics
Trample Summon/Spawn Support
Key triggers
Actively looks for clean Trample lanes into your formation. Uses Meteor Bombardment to scatter rocks across the battlefield. At the end of each round, performs a massive roar and gives Levitation to rocks on the map. The longer the fight goes, the more the board turns into a movement and hazard problem.

Moves to know

Important attacks, abilities, or fight behaviors to recognize.

Meteor Bombardment

Scatters rocks across the battlefield and starts turning the board into a hazard problem.

Massive Roar

At the end of each round, gives Levitation to rocks on the map.

Trample

Looks for direct lines into your formation if you leave space poorly.

Before the fight

Prep notes

Quick setup notes before you commit to Zaratana.

Encounter setup
When it happens

Appears as a House boss in Act 2.

Team planning
Recommended
1 ranged damage dealer1 mobility / escape unit1 board-control or cleanup unit1 stabilizer or safe frontliner
Avoid
Slow teams that get boxed in by clutterGreedy melee clumps with no recovery planUnits that need a perfectly clean board to function

Fight plan

The safest way to approach the fight without reading a wall of text.

Decision-first notes
Win conditions
Control the board so scattered rocks never snowball into a map-loss condition. Respect Trample lanes and avoid giving her easy collisions into your formation. Use rock-clearing tools to stop her support package from compounding for free.
Opener
  • Identify where Zaratana can Trample safely and deny those lanes early.
  • Start clearing the most dangerous rocks before they become a long-term board tax.
  • Do not greed for damage on turn one if it costs your escape tiles.
Midfight
  • Maintain spacing while controlling the board state created by Meteor Bombardment.
  • Keep rock count low enough that her end-of-round Levitation support does not snowball for free.
  • Spend turns on cleanup when needed instead of pretending every turn must be a pure damage turn.
Finisher
  • Close once the rock count is manageable and your formation is still stable.
  • Do not force an all-in if it leaves you exposed to Trample or a bad hazard turn.
  • End the fight while you still own the board, not after the clutter has already taken it from you.
Positioning & loadout
Run killers, positioning rules, and setup reminders.
β–Ύ
Run killers
  • Letting the battlefield fill with rocks until your movement lanes disappear.
  • Ignoring Meteor Bombardment and allowing auxiliary hazards to compound every round.
  • Failing to respect her Trample lanes and getting caught while boxed in by clutter.
  • Trying to race damage while the board is still unstable and hostile.
Positioning rules
  • Do not clump in front of obvious Trample angles.
  • Track where rocks are landing so you keep safe movement lanes open.
  • Reposition before end of round if Levitation-enhanced rocks will make the next turn worse.
  • Do not let your backline get boxed in while Zaratana still has a clean charge lane.
Loadout hints
Prioritize
Reliable ranged damage Tools for clearing rocks Mobility for avoiding Trample lanes
Useful
Board control Units that can function on cluttered maps Burst to end once the board is under control Emergency repositioning tools
Avoid
Slow formations that get boxed in by rocks Overcommitting into obvious Trample paths Ignoring auxiliary hazards for too long Greedy melee clumps with no recovery plan after clutter builds up

FAQ

Quick answers to the most common questions about this fight.

How do you beat Zaratana in Mewgenics? β–Ύ

Control the board first, deny clean Trample lanes, keep rocks from snowballing, and only push hard once your formation still has safe movement lanes.

What is the real threat in the Zaratana fight? β–Ύ

The real threat is not raw boss damage alone. It is the board getting worse through scattered rocks, Levitation support, and lost movement space.

What usually causes runs to fail against Zaratana? β–Ύ

Most runs fail because they ignore clutter too long, get boxed in by rocks, and then lose to one bad Trample or hazard-heavy turn.

What counters Zaratana? β–Ύ

Ranged damage, rock-clearing tools, mobility, and any board-control plan that keeps safe lanes open are the most reliable counters.