Breeding in Mewgenics is not just about pairing two strong cats and hoping for the best. If your rooms are badly organized, your line will stall out fast.
The best breeding setup is built around one rule:
Your breeding room should maximize inheritance without collapsing into overcrowding, fights, or wasted pairings.
That means balancing Stimulation, Comfort, and room roles across the house instead of trying to force every cat into one “do everything” room.
What Is the Best Breeding Room Setup in Mewgenics?
The strongest house setup is usually not one giant room.
Instead, the best long-term structure is:
- one main breeding room
- one holding room
- one mutation or fighting room
- optional reserve or secondary breeding rooms later
Each room should do one job well.
If you mix active breeders, storage cats, retired cats, and experimental lines into the same space, your house gets unstable fast. Overcrowding, low Comfort, and bad room tradeoffs can stop breeding entirely or get valuable cats killed.
How Comfort and Stimulation Work Together
Stimulation and Comfort are the two most important room stats for breeding setup, but they do different jobs.
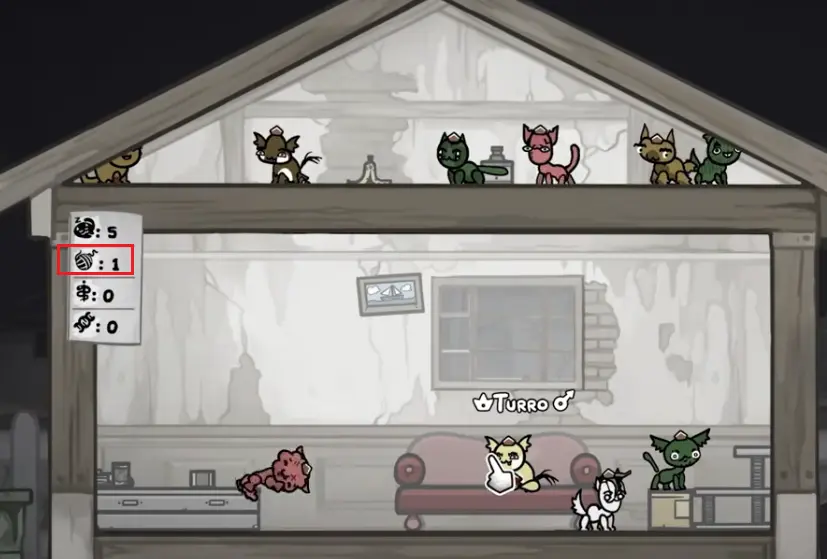
Comfort
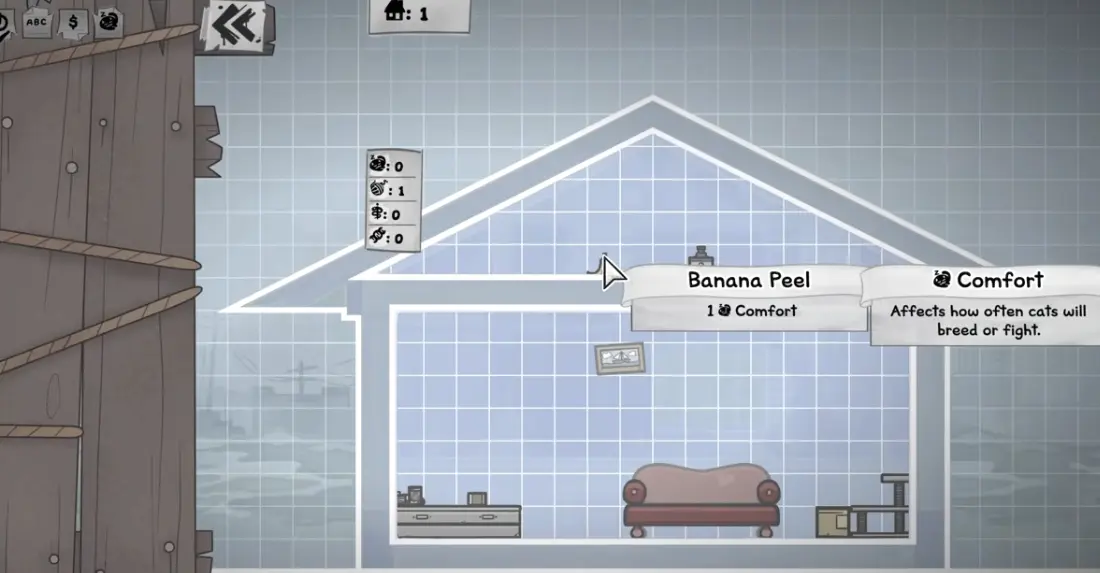
Comfort affects how often cats breed or fight. In practice, it is the stability stat for your room.
The most important rule is simple: keep Comfort positive.
Once Comfort drops negative, your breeding room stops behaving like a breeding room. Cats stop pairing consistently and start fighting instead. That means even a high-Stimulation room can completely fail if Comfort collapses.
That is why breeding rooms should never be designed around Stimulation alone.
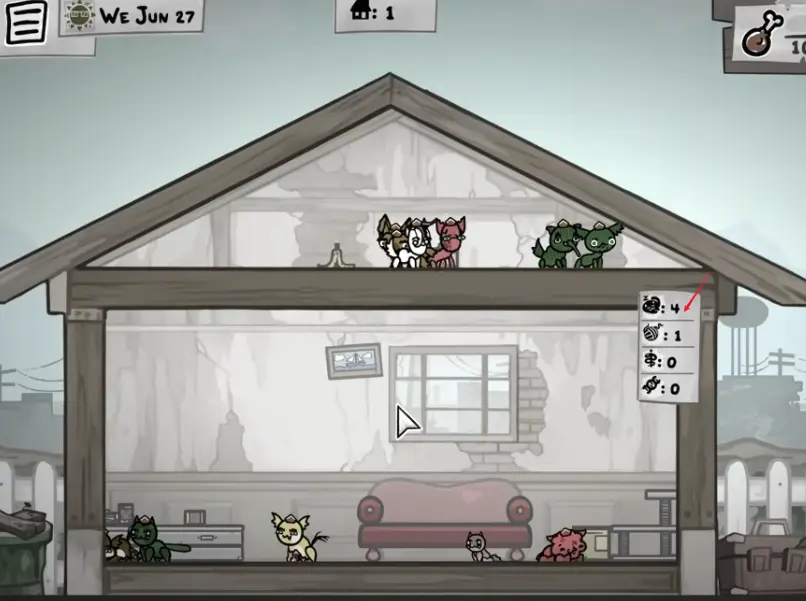
Stimulation
Stimulation is one of the most important house stats because it increases the chance that kittens inherit their parents’ strong stats and useful abilities.
That makes it the inheritance-focused stat. If you want kittens that carry forward the best traits from two parents, Stimulation is the number you are pushing.
The trap is simple: players often stack Stimulation too aggressively and accidentally destroy Comfort.
The real rule
The best breeding room is not the room with the highest possible Stimulation.
It is the room with:
- high enough Stimulation to improve inheritance
- enough Comfort to keep the room functional
That balance is what separates a usable breeding room from a failed experiment.
The 3-Room Core Setup
For most players, the easiest way to build a reliable breeding house is to split it into three roles.
1. Main Breeding Room
This is your most important room.
Its job is simple: put your best breeding cats in one controlled environment where inheritance odds are strong and room stability stays intact.
Main goal
- preserve and combine the best base stats
- improve inheritance quality with Stimulation
- keep Comfort high enough that cats actually breed instead of fighting
What belongs here
- your current stud
- selected breeding partners
- cats with top base stats
- cats that are mating-compatible and part of your active line
What does not belong here
- overflow cats
- injured run cats
- mutation experiments
- random strays you are not ready to use
- junk breeders you are “just holding for now”
Keep exactly 2 cats in the main breeding room
The safest default is to keep exactly 2 cats in your main breeding room: the active breeding pair.
That does two important things at once:
- it keeps the room focused on one pairing instead of diluting your breeding plan
- it avoids the overcrowding Comfort penalty that starts once the room gets too crowded
If you need overflow space, move those cats into a holding room instead of letting your best breeders share the room with everyone else.
Stat priority
For a main breeding room, your priorities should usually be:
- Stimulation
- Comfort
- any supporting utility that does not destabilize the room
First target: hit Stimulation 32
If you only optimize one number first, make it Stimulation 32.
That breakpoint matters because it guarantees the kitten inherits one active ability. In practical terms, the jump from 0 to 32 is the single most important early inheritance upgrade you can make. It turns the room from a general-purpose cat room into a real inheritance room.
Once your breeding room reaches 32 Stimulation, you can start treating your furniture decisions as optimization rather than guesswork.
Use an open layout, not a cluttered center
Furniture choice matters, but layout matters too.
A strong rule for breeding rooms is to keep the center open and push furniture toward the walls. This kind of open layout is commonly recommended because it keeps the room readable, reduces clutter, and is often reported to improve how often cats successfully attempt breeding.
The practical takeaway is simple: do not build your main breeding room like a storage closet. Keep the middle open and let the room behave like a breeding room, not a junk room.
Main rule
Do not overload this room with extreme low-Comfort furniture.
A breeding room only works if the cats inside it can stay calm enough to keep producing strong kittens.
2. Holding Room
This room exists so your main breeding room does not get ruined by overcrowding.
A holding room is where you place cats that are:
- not currently breeding
- waiting for future use
- too valuable to throw away
- not important enough to occupy breeding space right now
Why this room matters
A lot of breeding setups fail because players keep too many cats in the main room.
That causes:
- overcrowding
- lower room stability
- more fighting
- less reliable breeding behavior
The holding room solves that by removing pressure from your main breeding room.
What works here
This room should favor capacity, stability, and food management rather than inheritance optimization.
Storage Bins are a strong example of this kind of furniture because they help raise food capacity and make it easier to support a larger house without throwing your breeding room into chaos.
3. Mutation / Fighting Room
This is your controlled chaos room.
It is not your normal breeding room, and it should not be treated like one.
Its purpose is to let you experiment with:
- mutation-focused breeding
- risky inheritance setups
- low-Comfort environments
- disposable or non-core cats
Why this room exists
Later in the game, some players want to push beyond clean inheritance and start forcing unusual outcomes.
That is where a mutation or fighting room becomes useful. Instead of protecting every cat equally, you deliberately create a rough environment for experimentation.
What belongs here
- experimental breeding lines
- non-essential cats
- mutation projects
- cats you are willing to risk
What does not belong here
- your main breeding pair
- your most valuable long-term line
- cats you cannot afford to lose
Main rule
Low Comfort is acceptable only because this room is not your main breeding room.
If you try to run your whole house this way, your best cats will eventually pay the price.
Late-game variant: the “Fight Club” room
One extreme late-game version of the mutation room is what players often call a Fight Club room.
This is a deliberately harsh room built around very low Comfort and high Mutation. Instead of protecting every cat equally, you place average, expendable, or non-core cats into an isolated room where fighting, injuries, and unstable outcomes are expected.
Why would you do that?
Because this kind of room can create three different forms of value at once:
- it turns weak or surplus cats into a controlled sink instead of wasting space in your main house
- it can generate injured cats that players often use for progression-related vendor strategies
- it gives mutation-heavy lines a chance to produce unexpected high-upside results
In other words, a Fight Club room is not a normal breeding room. It is a late-game resource and mutation engine.
The key is strict separation. Do not place your best breeders, core run cats, or irreplaceable line leaders anywhere near this room. If Comfort is low enough to trigger constant fighting, even a powerful cat can come out crippled, injured, or dead.
Treat this as a disposable experiment chamber, not a standard housing solution.
Best Furniture Types for Breeding Rooms
This page is not a full furniture database, but several furniture types clearly show how breeding room decisions work.
The most important principle is this:
Choose furniture by stat tradeoff, not just by name.
If a piece gives you Stimulation but wrecks Comfort, it belongs in a different room than a furniture piece that supports stable daily breeding.
Low-risk support furniture
Furniture that gives a small positive stat without wrecking the room is excellent for your core house.
A simple example from your screenshots is Banana Peel, which adds Comfort. Small support furniture like this helps stabilize rooms without forcing extreme tradeoffs.
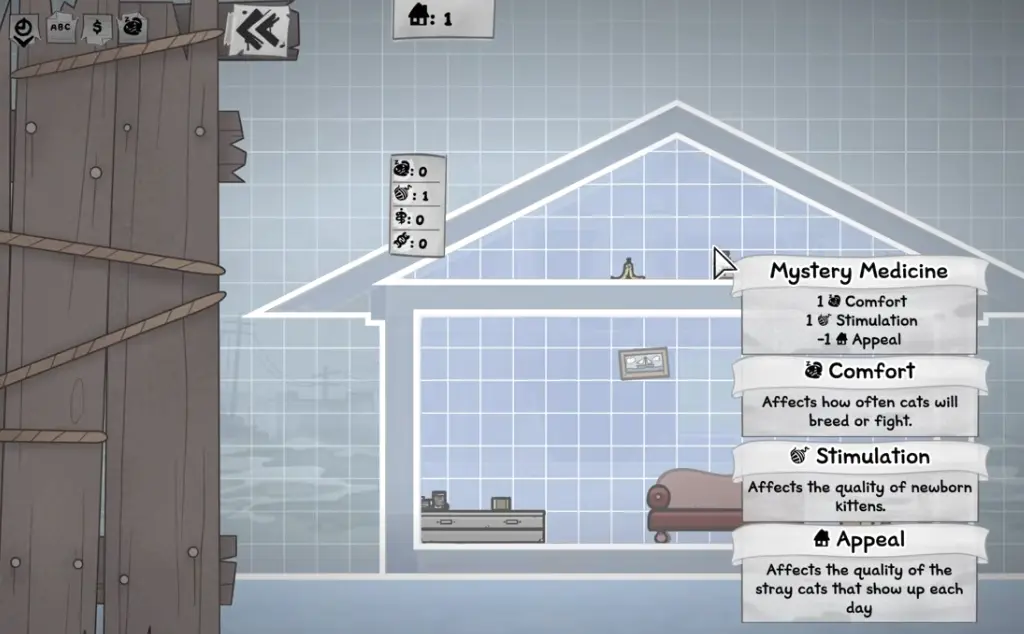
Another useful example is Mystery Medicine, which adds Comfort and Stimulation while reducing Appeal. That makes it a good example of how furniture should be judged by purpose:
- good for breeding-focused rooms
- weaker for stray-management rooms
- useful when you want direct inheritance support more than house-wide visitor quality
Toxic Waste Barrel
Toxic Waste Barrel is the clearest example of high risk, high reward breeding furniture.
What it does
- +4 Stimulation
- -2 Comfort
That makes it one of the strongest direct inheritance furniture pieces you can use, but also one of the easiest ways to break a room if you stack it carelessly.
Best use case
- inheritance-focused experiment rooms
- mutation rooms
- fighting rooms
- late-game specialized breeding suites that already have Comfort support
Bad use case
- your unbalanced early-game main breeding room
- any room where Comfort is already close to zero
Toxic Waste Barrel is powerful, but it is not a blind auto-include. It only works when the rest of the room is built to absorb the Comfort hit. To offset Toxic Waste Barrel’s -2 Comfort, pair it with high-Comfort furniture. Community-reported options include Pot O’ Potty (+3), Outhouse (+3), and Fireplace (+2). Two Toxic Waste Barrels plus one Pot O’ Potty nets you +8 Stimulation and +1 Comfort — a positive room that still pushes inheritance hard.
Hybrid stray-management furniture
Daruma Statue is valuable because it improves more than one relevant stat.
It can raise Appeal and Stimulation, but also lowers Comfort. That makes it useful in rooms where you want better strays without fully turning the room into your primary breeding chamber.
Capacity furniture
Storage Bins do not directly improve inheritance, but they support your breeding program indirectly by making your house easier to manage.
That is exactly what makes them valuable in holding rooms and overflow rooms.
Extreme late-game furniture
Some rare Touched variants can amplify both the positive and negative side of a furniture piece.
These are late-game tools. They are best used in isolated experiment rooms, not in the room protecting your best breeding line.
Early-, Mid-, and Late-Game Room Strategy
The best room setup changes as your house grows.
Early Game: Keep It Simple
At the start, do not try to build extreme rooms.
Your goal is to keep one room functional enough that breeding can happen consistently without your cats constantly fighting or dying.
Early-game priorities
- keep Stimulation and Comfort balanced
- do not overcomplicate the house
- use breeding attempts efficiently
- focus on finding and preserving strong base stats
- get your main room to 32 Stimulation before chasing fancy experiments
At this stage, stability matters more than fancy optimization.
Mid Game: Split Breeding and Storage
Once your house starts filling up, one room is not enough anymore.
This is when you should separate:
- active breeders
- overflow cats
- temporary cats
- non-core breeders
The holding room becomes critical here. If you fail to split rooms at this stage, overcrowding starts damaging the whole system.
Mid-game priorities
- main breeding room for top breeders
- holding room for overflow and storage
- keep the main room stable
- stop mixing valuable breeders with random utility cats
- keep the breeding room restricted to 2 cats
Late Game: Build Extreme Rooms on Purpose
This is when specialized rooms become worth it. By the late game, you have the resources to mitigate risks while reaping the rewards of high-tier stats.
- Mutation Room: Maxed out for specific environmental triggers.
- Fighting Room: High intensity for training combat stats.
- Second Breeding Room: Focused specifically on high-tier inheritance.
- Reserve Room: A safe, low-stress environment for retired elite cats.
The Key is Intentionality
Do not let your whole house become extreme. Keep the risk contained to rooms built for that purpose. If every room is a hazard, your cats will never have a place to recover.
Elite Breeding Breakpoints
Late-game breeding rooms targeting ability inheritance should push toward specific Stimulation thresholds.
| Target Goal | Stimulation | Inheritance Guaranteed |
|---|---|---|
| Early Game Baseline | 32 | Basic success rate boost |
| Passive Specialist | 95 | Guarantees one passive ability |
| Active Specialist | 196 | Guarantees two active abilities |
Pushing toward 196 Stimulation is the gold standard for creating “Perfect” kittens. ensure only your high-stamina breeding pairs are permitted inside.
Common Breeding Room Mistakes to Avoid
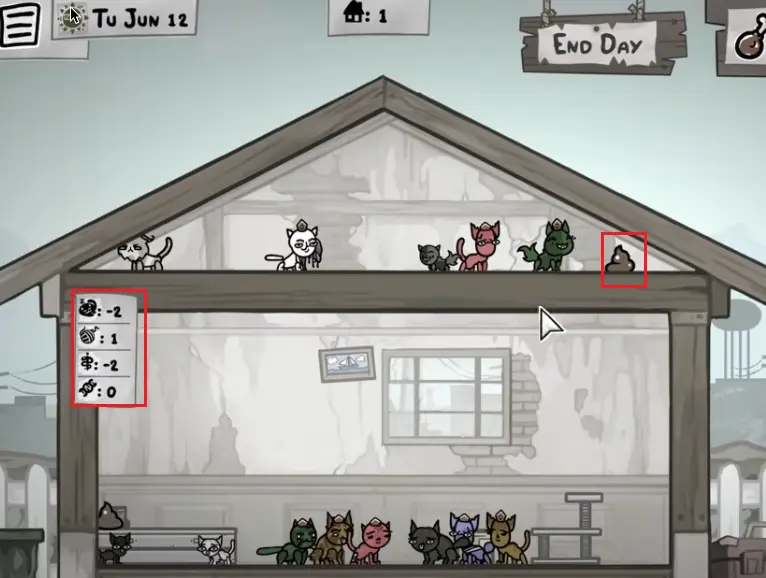
1. Letting poop and corpses pile up
This is one of the fastest ways to ruin a breeding room.
If filth or dead cats are left in the room, Comfort can collapse quickly. Once that happens, breeding behavior falls apart and the room can stop functioning the way you intended.
What to do instead
- clean aggressively
- do not tunnel vision on genetics and ignore maintenance
- treat room upkeep as part of breeding, not a separate chore
2. Mixing breeding and storage in one room
This creates overcrowding, which is one of the biggest hidden killers of good breeding setups.
At first it may seem harmless, but eventually the room becomes unstable and your best breeders start living in the same conditions as temporary overflow cats.
What to do instead
- move non-essential cats into a holding room
- keep your main breeding room selective
- protect your breeders from population pressure
3. Stacking extreme Stimulation furniture in the main breeding room
This is the most common optimization trap.
Players see that Stimulation improves inheritance and assume they should stack as much of it as possible in their core breeding room. But if the furniture used to achieve that destroys Comfort, the room can become worse overall.
What to do instead
- use extreme Stimulation furniture in specialized rooms
- keep your main breeding room balanced
- aim for 32 Stimulation first before you chase extreme numbers
- test aggressive setups in isolated spaces first
4. Using your best breeders in risky rooms
Mutation rooms and fighting rooms are not for everyone.
If you are still building your core line, sacrificing your best breeders to unstable conditions is usually a bad trade.
What to do instead
- keep core breeders protected
- use backup lines and non-essential cats for testing
- move only proven or expendable cats into risky setups
A Practical Breeding House Blueprint
If you want a simple working plan, use this:
Room 1: Main breeding room
- 2 cats only
- high Stimulation
- stable positive Comfort
- open center layout
- no overflow cats
Room 2: Holding room
- Storage Bins
- temporary cats
- overflow management
- not a core breeding space
Room 3: Reserve room
- retired elite cats
- future breeders
- defenders
- Health + Comfort focused
Room 4: Mutation / passive experiment room
- specialized inheritance testing
- risky cats only
- low-Comfort setups allowed
Room 5: Secondary breeding room or fighting room
- use for branch diversification
- or isolate combat/fight-oriented experiments
That gives you a house with structure instead of chaos.
FAQ
What is the best stat for a breeding room in Mewgenics?
For the main breeding room, Stimulation is usually the most important stat because it improves inheritance quality. But it should not be pushed so hard that Comfort collapses.
What is the first breeding room breakpoint to hit?
The first major target is Stimulation 32. That is the most important early breakpoint because it guarantees inheritance of the first active ability.
How many cats should be in the main breeding room?
The best default is 2 cats only: your active breeding pair. That keeps the room focused and avoids unnecessary Comfort pressure from overcrowding.
Should I put Toxic Waste Barrel in my main breeding room?
Usually no. Toxic Waste Barrel is strongest in experiment-heavy or high-risk rooms. In a main breeding room, the Comfort penalty can make the room too unstable.
What furniture is best for a holding room?
Furniture that supports stability and capacity is best there. Storage Bins are especially useful because they increase food capacity and help support larger populations outside the breeding room.
Should I use one room for all my cats?
No. That works briefly in the early game, but it becomes inefficient and dangerous once your population grows. The best setups separate breeding, holding, and experimental roles.
Is low Comfort ever useful?
Yes, but only in specialized rooms like fighting or mutation setups. Low Comfort is generally bad for your main breeding room, and negative Comfort can stop the room from functioning as a reliable breeding space.
Final Take
The best breeding room setup in Mewgenics is not about chasing one giant number.
It is about hitting the right thresholds in the right room:
- get your main breeding room to 32 Stimulation first
- keep Comfort positive
- keep exactly 2 cats in your core breeding room
- move overflow into a holding room
- save extreme furniture like Toxic Waste Barrel for rooms that can absorb the Comfort loss
- use open layouts in serious breeding rooms instead of cluttering the center
That is how you balance Comfort, Stimulation, and furniture tradeoffs without wrecking your best line.
If you want the simplest version, start with one stable breeding room, split out a holding room as soon as your cat count grows, and save extreme furniture for isolated late-game experiments.